5 Tips for Moving-in Cleaning

In Nigeria, the month of November and December is characterized by relocation, it is that time of the year when families decide to relocate, though due to various reasons, but a recent survey further reveals an increase in the number of relocations compare to other months of the year.

So, whether you are renting or buying a home, you will be optimistic that you will have a great time living in your new house. But on top of your first checklist when moving or planning to move is how you want to deep clean the house because you would have already visualized how you want the spaces to be filled.

When moving into a new house, cleaning it before you move in is ideal, since you won’t have to deal with boxes and furniture. It’s okay to wait until after moving to clean – just don’t skip it entirely. You can also call in a cleaning company like Kleenrite to do the cleaning before moving in.

Here are 5 Tips for Moving-in Cleaning

Moving in cleaning involves quite a few steps, but with some elbow grease and maybe another pair of helping hands, you should be able to get your place looking like new in just a day or two depending on the size of the property. To help you get started, here are a few tips.

  1. Before cleaning the low, clean the high

The ceiling and other things that are high should be the first things you should clean. If it’s a pre-furnished home you could have shelves, fans, and other electrical installations. Clean them, dust and remove the cobwebs. Do these across the rooms.

Caution: Safety first, ensure that all electrical connections are turned off, preferably from the main electric box.

  1. Clean the Windows

Techniques used in cleaning the windows are different from the floors, so you must be knowledgeable about these techniques if you want to get the best clean for your windows.

Firstly while planning to clean the window of your new house make sure that it’s done during the cooler hours of the day or when it’s not sunny. The reason is to prevent streaks on the window glasses because the window cleaner would dry up faster before wiping off which will lead to hard-to-remove streaks, and that is going to increase the time spent cleaning a particular window. You might consider cleaning other parts of the house if you find yourself cleaning the windows when it’s sunny.

In the next article, we will be sharing some mistakes you shouldn’t make when cleaning the windows

  1. Clean the Kitchen Zink

The kitchen zink is probably the most used kitchen/household equipment and can be the dirtiest. If this part of the kitchen is not properly cleaned, the house might just not smell fresh. Here is how to clean your sink: Start by coating the wet sink in baking soda and adding a little dish soap and hot water to your sponge.

Whenever you scrub a sink, start with the sides of the basin and work your way down, pushing any grime directly into the drain. Keep adding soap and water as needed or until the surface is scum-free.

  1. Clean the Toilet

Begin by applying toilet cleaner to the bowl, and allow it to soak for 15-20 minutes. Within 15 – 20 minutes use the time to spray the other part of the toilet with disinfectant. Then scrub and clean the exterior. By now the bowl would have been well soaked, use your toilet brush to clean the bowl and rinse thoroughly.

With this simple technique, you can be sure of bringing about that sparkling new feel to your toilet.

  1. Clean the floors

For a deep clean, mix 6-7 drops of mild detergent (dish soap is usually fine) with one gallon of warm or hot water. Use the mixture to dampen a mop, and clean the floor in sections.

Action Point

We understand there are different reasons for relocation, but one common part of relocation is that deep cleaning is always required and Kleenrite is the best plug for home cleaning services. Ease yourself of the daunting task of cleaning, let us handle it!

Click here to schedule an assessment of your new accommodation.


Here are the 2 most effective factory or warehouse cleaning plan

The type of work you perform on your business premises will affect how often it needs to be cleaned, but you should perform two kinds of cleaning routines: deep and regular cleaning.

Here are the 2 most effective factory or warehouse cleaning plan

Deep cleaning

Dust and grime will accumulate on your equipment and the floor of your warehouse over time. Neither of which can have a positive impact on productivity. In order to prevent this from happening, you need to thoroughly clean your warehouse. The length of time it takes for each section of your premises will depend on the type of work you perform.

During a deep clean, you should spend several hours scrubbing every surface and piece of equipment in your warehouse or factory with heavy-duty cleaning equipment and supplies.

You should schedule a deep clean during a slow period if you plan on enlisting your staff to clean and tidy their own section. The cleaning should take place at the end of the day or on the weekend if you have hired outside help to avoid wasting productive time. It is best if you employ the service of a professional cleaning service provider, to avoid overworking or distracting your staff from their core responsibility at work.

Here are in-house Deep warehouse or factory cleaning checklist

  1. Establish a regular schedule for cleaning your warehouse or factory.
  2. Employees are expected to clean their designated areas thoroughly from top to bottom.
  3. Assist each employee in thoroughly cleaning everything within his or her designated area by providing them with the necessary equipment and supplies.
  4. All employees should be given enough time to clean all the equipment within their designated areas to the required standard.
  5. Make sure your employees note down the length of each process and ask them how it could be expedited.

Regular cleaning schedule

Keep your staff on top of things between deep cleanings by instructing them to perform regular maintenance routines to extend the time between cleanings.

Several factors determine how often and what should be included in this routine, such as:

Is your factory or warehouse involved in any kind of manufacturing? Is there a lot of mess, dust, and debris created by the machines you use?

Messy work environments may result in lost customers. Do you ensure that the environment is sterilized if the equipment you use depends on sterile conditions? Messy work environments may result in lost customers. If you run a hospital for instance and you don’t keep it in a good hygienic condition you shouldn’t be expecting more patronage anytime soon.

You should plan in regular maintenance whenever necessary, just as you do with your intensive cleaning routine. As a rule of thumb, each work station should be left ready for the next person to come in and use straight away. Your staff should therefore be allotted 5 minutes at the end of each shift to clean and tidy their work station or the machine they were using so the next employee who needs to use it can come in the next day and start work without any delays.


If you have any equipment that is used infrequently, it should be given a quick clean every few weeks to prevent dust from building up and potentially affecting its performance.


Employees should also be instructed to clean up any spills, debris, or rubbish as they appear to prevent them from causing a health and safety hazard or obstructing a thoroughfare.


Regular warehouse or factory cleaning checklist

Provide employees with 5 minutes at the end of each shift to get their work space clean and tidy so the next person can come in a use it straight away.

Provide employees with the equipment and supplies they need to clean up any spills and messes as they happen and encourage them to be proactive in tackling mess in the workplace.

Tips for cleaning stainless steel appliances, sinks, and other surfaces.

New stainless steel appliances instantly brighten up your kitchen. Even new cooking utensils and sinks can make a difference. Nevertheless, after the second or third week, these items will likely be dulled from little finger prints, water spots, oil splatters, and just plain old wear and tear.

No matter how old or well-loved your stainless steel kitchen items are, there are easy ways to restore their shine.

A step-by-step guide to cleaning stainless steel appliances

When you wipe stainless steel with a microfiber cloth made specifically for this kind of surface (steel), you will find it easy to clean, despite how easily it gets stained.

Oily stains can be removed from stainless steel appliances without scratching and many cleaners leave behind protective coatings to prevent fingerprints.

The microfiber cloths lift, trap, and remove dirt and grease more effectively than plain clothes or sponges, Oily stains and stubborn fingerprints may require some stainless appliance cleaner.

There are other at-home alternatives you can use to brighten up stainless steel appliances if you don’t have any stainless steel appliance cleaner on hand. Stainless steel sinks and cooking utensils may be cleaned with stainless steel cleaners and scrubbers, but never with appliances.

In some cases, they can scratch the finish due to being too abrasive.

The Don’ts of Stainless Steel Appliance Cleaning

  • To avoid damaging the finish of the appliance, avoid abrasive scouring powders, bleach, and ammonia.
  • Stainless steel should never be wiped against its grain. Avoid streaks by wiping against the grain.
  • Stainless steel appliances should not be allowed to air dry after cleaning. Clean up streaks and spots with a microfiber cloth and restore their shine.

The Best Way to Clean Stainless Steel Sinks and Cooking Utensils

If you use a mildly abrasive cleaner and a scrub pad to clean stainless steel sinks and pots, it won’t damage them.

A warm, glowing patina (a green or brown film on the surface of bronze or similar metals, produced by oxidation over a long period) hides scratches, removes stuck-on food, and cleans heat marks on cooking wares. The best shine comes from thorough rinsing and drying.

 Stainless Steel Appliance Streak Removal

For the best results, use a cleaner made specifically for stainless steel, rather than dish soap or mineral oil to remove pesky marks and smudges.

To help repel soil and fingerprints, look for a cleaner with a protectant. This will reduce the frequency with which you need to clean your appliances.

Use a stainless steel cleaner according to the instructions on the package and wipe in the direction of the metal’s grain regardless of what kind you use.

In order to prevent streaks, one should not wipe against the grain or with a circular motion, use the wrong cloth or a dirty one, apply enough cleaner so the greasy film dissolves, and buff the surface thoroughly after cleaning.

Clean a microfiber cloth well afterward to add shine to the entire surface.

What you need to do to remove rust from stainless steel appliances

A damp cloth dipped in baking soda can be used to remove rust if your appliance’s protective finish has been damaged and rust spots are forming. The area should be cleaned, polished with stainless steel polish, and blended.

Action Point

Stainless steel finish are no doubt beautiful to see in the home, especially in the kitchen area and can become an eye soar if it’s not properly cared for i.e cleaning as at when due. We hope these simple DIY tips for cleaning stainless steel surface will prove useful for you.

With these your kitchen wares, sinks and stainless steel appliance will always look gleam.

Here are 4 Tips to Keep Your Reception Area Tidy

Even so, it’s hard not to judge a business by its reception area, just as you shouldn’t judge a book by its cover. Visitor’s first impression may be of the reception area of your business. You can be sure that they will form an opinion about your company based on what’s in front of them while they’re waiting. There are many oversights that could mess up the start of your next meeting, including soiled floor and cluttered counters.

Here are 4 Tips to Keep Your Reception Area Tidy

Making a memorable first impression on prospective customers and employees begins with an inviting reception area. Our office cleaning experts have come up with four office cleaning tips you can use to keep your reception area in good shape.

  1. Clear the space

Visitors will not feel comfortable in a cluttered, crowded reception area. A cramped workspace will indicate a disorganized company, which may be reflected negatively in your business. There are some steps you can take to make your reception feel larger even if small and medium sized businesses don’t have the budget for a large, elegant waiting area:

  • Make sure that your reception area does not double as a storage area for files, stationery and other equipment. Find an alternative storage area or hidden solution to this dilemma.
  • You shouldn’t saturate your reception with magazines – While a few business-appropriate magazines show your company is on top of things (and are diverting), take care not to overstuff your reception with publications. Keep your collection small and regularly updated.
  • Don’t put up a reception desk – If your area is too small for a desk, consider having a mounted tablet where guests can sign in.

Reduce the amount of furniture in your reception area. In order to maximize your reception space, downsize reception furniture to a few sleek, simple chairs so that guests won’t have to wait long for their appointments.

  1. Get rid of stale smells

In an open-plan office environment, workplace smells, like coffee, snacks and lunches packed in food flasks and plastic containers, are unavoidable. Smells can have a substantial impact on a visitor’s first impression of a business, so reduce them as much as possible in your reception area. To keep your reception area smelling pleasant, avoid consuming food in the reception area and nearby areas, and consider using an air freshener. This entrance space might benefit from a few simple transparent glass covering that will provide more privacy for your employees.

  1. Floors are the focus

It is likely that employees will pass through the reception area on their way to and from their desks. Hoovering, sweeping, or mopping may be necessary more frequently in your reception area. To prevent mud and debris from damaging your reception area, make sure you install a bootscraper and an effective doormat. Also, consider more frequent floor cleaning of this area.

  1. Providing amenities

It is essential to have a small waste bin and a small recycling bin at the reception desk. Visitors can discard rubbish conveniently by using these amenities, which prevents waste from being left behind. You might also consider installing a water dispenser in your waiting area to enhance comfort.

Action Point

Maintain a regular cleaning schedule that pays special attention to your reception area. We have been providing outstanding office cleaning services across Nigeria for over 20 years. You can reach us at 0803 620 8815 to learn more about our services.

It’s time to talk about toilets

We discussed smells in the office in December 2021. We did not put much emphasis on toilets due to their grossness.

The truth is, we’re pretty tough cleaners, and we don’t care about them at all. In fact, we clean toilets every day, so we don’t have a problem with that. This conversation is more important.

It’s time to talk about toilets

Toilets are essential for all of us. We all know how they function. Why don’t we talk about it? Not so cute!

The truth is, if we didn’t know about toilets, we wouldn’t make very good office cleaners. It’s not our intention to boast, but we really want you all to see how good we are. Toilets will, of course, rear their heads at some point.

Our goal is to keep things classy and avoid the horror stories, so we’ll get to the important stuff: how to deal with smells and how to make the office toilets more pleasant for everyone.

Keep your hands on the wheel – we are going inside (not literally).

The types of restrooms in offices

A typical office has two kinds of toilets: communal toilets in large teams of purpose-built offices and single toilets in smaller or converted office spaces.

At times, there are urinals, at other times only cubicles.

Toilet blocks made for special purposes are usually easier to clean, despite their size. A large part of the floor is covered with solid surfaces, there is almost no dust to contend with, and no pipework is present. Urinals are more common in large buildings, and they are easier to clean.

It’s harder to build single toilets since they’re usually an adaptation to a need rather than being designed for a specific use. It doesn’t matter what the nooks, crannies, or odd dust-collecting additions are, we’ve seen them all! As a result, they usually require less cleaning than toilet blocks, which in a large commercial office require regular cleaning during the day.

You should clean the toilets based on the size of your team, the size of the toilets, and how often people use them. For example, a small office with a single toilet might only need a weekly cleaning, whereas an office with several cubicles might need cleaning several times a day.

How do professional cleaners clean toilets?

Professional cleaners use products similar to those used in the home. There are usually differences in their appearance and labelling, but they do the same thing. It is often recommended that vinegar be used to decalcify the water around taps, toilets, sinks, etc.

To prevent germs in the workplace, office cleaners also use a general disinfectant, such as bleach. Toilets and common surfaces are treated with this.

Once the decalcifier has begun its work, a pumice stone can be used to remove stubborn stains that a toilet brush can’t handle. Despite its abrasive nature, pumice is softer than porcelain, so it won’t scratch like wire wool can.

Paper towels are another thing that professional office cleaners might use. Due to their disposable nature, they won’t contaminate like sponges or cloths, so you can use them for mucky work without having to worry about germ spreading.

Office cleaners use different techniques, but they’re always fast. Cleaning products are applied in the right order, which ensures an efficient clean. In most cases, limescale remover comes first, followed by cleaning and disinfecting other surfaces- after the toilet is scrubbed and disinfected, everything is given a final wipe with paper towels, for a final clean and dry.

Disposal of waste

The proper disposal of toilet waste is important. When insulin is taken or sanitary products are changed, the toilet is often used – and the waste must be treated carefully.

If you have office toilets, make sure they are equipped with safe disposal units and bins. You should also encourage your staff to use the appropriate bins when needed.

It is important for office cleaners to handle toilet waste carefully, because there may be sharp items. They should also take care to put warning labels (for customers and staffs) on the bags and the waste.

What to do about odours

Let’s just be honest here. We dispose of our waste in the toilets, so they are smelly. It can’t be avoided. But we can reduce the fallout by using air fresheners and ensuring that there is good ventilation.

If you regularly clean toilets with windows, you can usually avoid smell buildup when they’re open. The smell, however, can sometimes linger. Some smells should definitely be investigated – they could be related to a leak.

These methods should help you keep odours at bay:

  • Install automatic air freshener system.
  • Make sure the bins are emptied with care.
  • Utilize scented cleaning products and clean regularly
  • Open windows and keep vents clear for proper ventilation.
  • Hire office cleaners to handle it for you.

A professional office cleaning team such as Kleenrite Cleaning Service has extensive experience with the cleaning of office toilets. You can reach us at 0803 620 8815 today to find out how we can clean every corner of your office, while disrupting your business to the minimum.

What You Need to Know About Cleaning Office Blinds

The stress of professional life isn’t going away, regardless of whether your team works from home intermittently or steadfastly. In terms of workplace wellbeing and productivity, however, work environments can make a huge difference regardless of where employees are based.

What You Need to Know About Cleaning Office Blinds

To help with this, we have put together a quick guide on how to clean office blinds. It is unlikely that your office blinds will be the focus of your cleaning efforts, which is why you may neglect this part in the workplace. Office windows offer employees a much-needed dose of vitamin D, as the days get shorter and the nights grow longer. By keeping their fittings clean and dust-free, offices will appear brighter, and staff members will feel more comfortable.

Dusting time! Learn how to clean office blinds with these helpful tips…

  1. Roller blinds: how to clean them

Depending on the kind of material your roller blinds are made from, you will need different cleaning products. Before you start scrubbing, check their labels.

If you need to clean your blind quickly, simply unroll it, spray the surface with a cleaning solution, and wipe it down. Continue this procedure on the reverse side, if necessary. To thoroughly clean the blind, remove it from the wall and soak it in water mixed with a mild detergent in the tub or bucket. Allow the blind to soak for half an hour to an hour before hanging it up to dry. Once the blinds have dried, you can reattach them.

  1. Venetian blinds: how to clean them

Since they are narrow and prone to collecting dust, these horizontally slatted blinds can be tricky to clean. The best way to maintain venetian blinds is to dust them regularly with a feather (or fluffy) duster. A “venetian blind cleaner” can make your life even easier – the handy tool can remove dust from multiple slats at once. You can wash your blinds with a damp cloth and multi-surface spray if they become sticky, stained, or need a deeper clean.

  1. Vertical blinds: how to clean them

Do your research to find out which cleaning products can be used on vertical fabric blinds. By using this advice, you can keep your blinds in great shape by regularly wiping them down with a damp cloth In addition to using a vacuum cleaner (soft brush attachments work best) to remove dirt, you can also give them a light brushing.

Whenever you need to deep clean your vertical office blinds, dust them off, remove any stains using a suitable stain remover, and unhook them. Just like the roller blinds described above, your blinds can be soaked in warm water and mild detergent once they have been loose. They should be hung up to dry before reinstalling.

Action Point

Make your office cleaning routine more effective. With meticulous attention to detail, Kleenrite offers flexible cleaning services that fit around the needs of your business.

Discover why your office smells, and how you can fix it

It’s a bit of a joke that our sense of smell exists. People usually think about this sense only when something stinks, which is why it is most people’s least favourite. Humans didn’t develop olfactory senses to compete with animals – their noses aren’t even close to as good as a dog’s (although dogs receive all the credit for their strong sense of smell, they’re completely outdone by bears, sharks, and elephants).

For all of its relative weaknesses, our sense of smell is far from useless. Our sense of smell is one of the most powerful senses we have.

We have relied on smell throughout history to help us survive – by quietly telling us when it’s safe to eat, when danger is present, and by helping us recognize familiar surroundings.

We associate smells with emotions and memories – such as how the scent of disinfectant can transport you back to the first day of school, or the memory of a hospital corridor. Similarly, the smell of freshly cut grass can evoke an old memory that has long remained buried in the back of one’s mind.

Discover why your office smells, and how you can fix it

Your home and office both have a distinct smell. As we become accustomed to those smells, usually we become blind to them. On the other hand, we notice smells when they are unpleasant.

It’s usually pretty easy to figure out what smells at home:

  • Overflowing refuse bins
  • Animals (and people!)
  • The toilets

Often, the same is true in the office as well. In many cases, however, tracing the origins of office smells can be difficult. With this article, let’s check out the sources of the smell in your office and see if we can make a difference.


  1. Food

Is there fish in the microwave? How about abandoned lunches left in the fridge for months? What about a forgotten sandwich in a desk drawer? Those are all familiar experiences in the workplace – and can sometimes cause a little controversy!

The majority of employees admit that they usually eat at their desk (31%) as well. This is the recipe for a keyboard, desk, office chair, and phone-crushing nightmare. Warming up lunch is also a whole smell-producing ordeal (usually only cured by opening the windows).

It is possible for sticky foods eaten at desks to penetrate woodwork or fabric, leaving long-lasting odors. We recommend eating in a canteen or break room rather than eating at your desk during lunch. If you’re prone to spills and if you’re prone to smelling, vinegar is a great way to clean up.


With regard to forgotten sandwiches and left-over groceries, it is crucial to encourage good cleaning practices and get everyone on board with tossing out old food. After all, it could make people ill or trigger allergies, so when it comes to food, office cleaning must be taken seriously.

  1. Water sinks

Kitchen sinks get absolutely everything thrown at them at the office. There are probably a lot of things left in the sink, so it’s not surprising that they can smell bad. Food, teabags, packaging, we’ve seen it all!

The office sinks that are clogged and slow to run are almost always the source of office odors as well. Cleaning out dishes, food, and debris out of your office sink as soon as possible is your best bet to prevent an office sink smell. You can, however, try this if you’ve passed the point of no return and your office kitchen sink is dripping:

  • Fill a kettle with boiling water and pour it down the drain.
  • Add about 50g of bicarbonate of soda and let it work for a few minutes.
  • Take 250ml of vinegar and 250ml of hot water and mix them together. Let it sit for 10 minutes.
  • Flush the sink thoroughly with water.
  • Your sink should be freshened up and speeded up by this!
  1. Rugs or Carpets

Once you’ve sifted through everything and found nothing, try aiming your nose downwards – below your feet!

Office carpets are often the most difficult to pinpoint when it comes to office smells. Nevertheless, years of mucky feet, walking in mud, and forgotten spills add up to a pretty bad smell In wet weather and with increased foot traffic, a musty, mouldy smell may arise.

There is probably no way your office vacuum cleaner will be able to get rid of that – but you can try treating the carpet with bicarbonate of soda Testing baking soda on a small patch of carpet first is a good idea since it is a mild alkaline.

Baked soda absorbs oil and dirt, which helps remove even stubborn stains and odors more effectively. Pour baking soda on the carpet and let it sit for as long as possible.

After that, simply vacuum everything up.

Action Points

Baking soda can sometimes fail to reach the mark, and carpets may still produce unwanted office odors. Use our office carpet cleaning service for restoring carpets and getting rid of lingering odors. We use powerful, professional grade equipment to clean your office carpets.


Keeping your office clean with a keen nose for details is our specialty at Kleenrite Cleaning Services. Contact us at 0803 620 8815 today and discover how we can make office cleaning as hassle-free and as minimal as possible for you.

Cleaning Tips: 5 Types of Waste and How to Remove them

Around the world, people dispose of 2.12 billion tons of waste every year. One of the primary reasons for this staggering amount of waste is that humans trash approximately 99% of what they buy within six months of purchase.

Waste has been a huge environmental problem around the world since the industrial revolution. It’s not easy to deal with the amount of waste that’s generated continuously. If waste isn’t properly disposed of, the consequences can be serious.

Cleaning Tips: 5 Types of Waste and How to Remove them

With this article, we will discuss the different types of waste and how they can be properly disposed of. Keep reading to find out more.

How do we define waste?

Waste is anything we throw out because we don’t need it. Most waste is considered garbage or trash. What does that mean? Paper, cardboard boxes, and other solid waste constitute trash. By contrast, garbage refers to waste that comes from your kitchen and bathroom.

Individuals, households, schools, offices, hospitals, and industries generate waste. The range of sizes is also endless, from something as small as a rusty razor blade to something as large as the body of an old truck.

What types of waste are there?

  1. Liquid Waste

Dirty water, wash water, organic liquids, waste detergents, and sometimes rainwater constitute liquid waste. This type of waste is typically found in homes, businesses, and industries. You can either classify liquid waste as a point or non-point source waste depending on its origin.

Manufacturing liquid waste can be categorized as point source waste. On the other hand, liquid waste from natural sources is not classified as a point source.

  1. Solid waste

Solid waste may include a wide range of items found in households or commercial facilities. To better understand this type of waste, let’s break it down into five categories:

  • Plastic Waste includes bags, containers, jars, bottles that are made of plastic.
  • Paper/Card Waste, such as newspapers, packaging materials, and cardboard.
  • Metals and Tins – found throughout your home and business in different forms
  • Broken plates and ceramic cups, as well as broken glass bottles, make up broken ceramics and glass.


  1. Biodegradable waste

Nearly all households produce biodegradable waste. Examples of this waste are food waste, garden waste, and so on. Even though this waste is decomposed by microorganisms over time, it is still necessary to dispose of it properly once it has been generated.

  1. Recyclable Waste

Just as the name ‘recyclable’; a recyclable product is any waste that can be converted into a reusable product. There’s a good chance you can recycle a great deal of construction waste, including masonry, metal, paper, and furniture.

  1. Waste containing hazardous materials

Hazardous waste is any waste that is toxic, flammable, corrosive, or reactive. The waste can be harmful to both you and the environment. Toxic chemicals and electronic waste are common examples of hazardous waste.

How to dispose of waste

Around the world, different types of waste management are used by different communities. We explore five effective types of waste management in this section.

  1. An hygienic landfill

The majority of the waste we generate is non-recyclable. One of the best ways to safely dispose of such waste is to use landfills.

Excavation is performed in an area with non-porous soils and low groundwater levels. An excavation is followed by construction of a protective base that prevents toxic chemicals from entering the water zone below. A layer of soil is spread over the waste, and then it is compacted.

In some parts of the world, landfills are used as parks while the waste below decomposes. It usually takes 20 to 30 years for the waste to decompose. No construction is allowed in the landfill area during this time.

  1. Recyclables and reusables

The most effective way to manage waste is to recycle and reuse. Interestingly, less than 12 percent of all waste created being recycled and about 80% of these wastes end up in landfills and dump sites. We throw away a large percentage of items that can be recycled, which is a sad fact.

Materials such as scrap metal can be recycled to earn revenue and conserve natural resources. Paper bags and plastic bottles can be reused instead of being thrown away. We can save money and reduce waste by implementing these practices.

  1. Composting with worms

Vermicomposting is good for organic waste disposal. Vermicomposting is a type of waste disposal that uses worms to help decompose waste. Along with getting rid of waste, vermicomposting improves soil nutrition.

When worms decompose waste, they produce excrement that improves the soil around them.

  1. Incineration of waste

When dealing with hazardous and highly toxic wastes, incineration is a highly effective method of disposal. This includes medical waste. Incineration significantly reduces waste. The major advantage of incineration is its remarkable cost-effectiveness. In addition, the byproducts of incineration can be used in other ways.

By using the heat produced, you can create energy, while ash might be used in hydroponic systems.

  1. Aquatic Waste Disposal

When disposing of hazardous waste, it is important to keep the waste as far away from people as possible. For radioactive waste, for example, you should dispose of it in a large body of water such as an ocean or a sea.

After sinking deep into the water, the substances will be safe from human contact once they have submerged.

Action Point

Waste Disposal Must Be Done Properly. Managing the waste we generate every day can seem daunting, but it doesn’t have to be. In order to dispose of waste correctly, we need to know the different types of waste that we are dealing with.

In your home or business, do you want to handle waste in an easy and effortless manner? Get in touch with us today for more information.
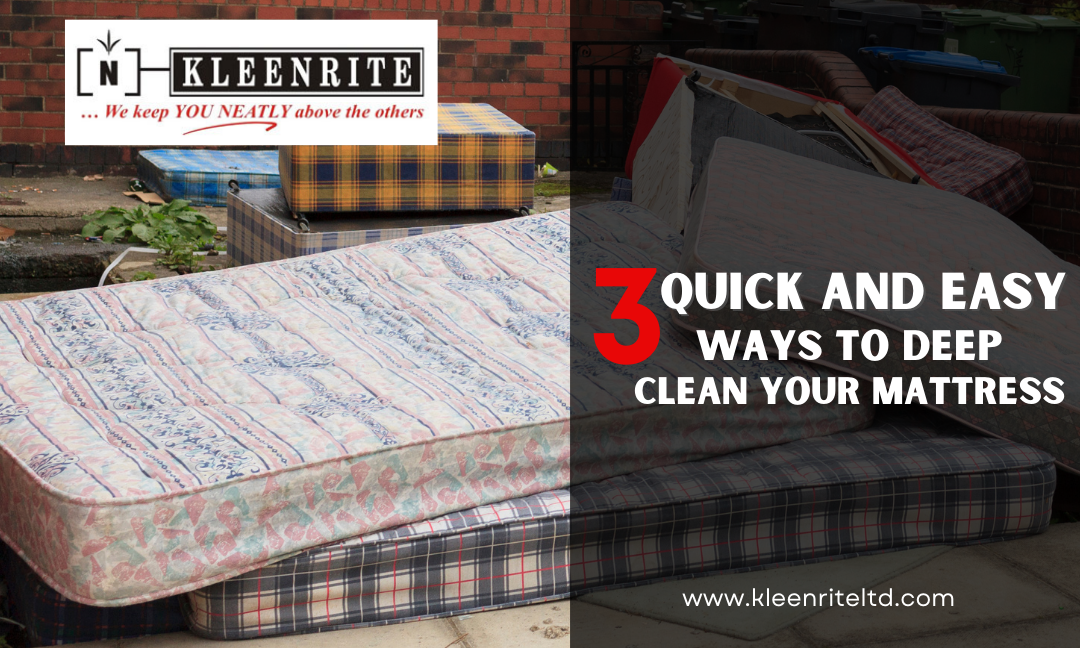
3 Quick and Easy Ways to Deep Clean Your Mattress

In case you haven’t thought about your mattress lately, consider this: you sleep on it for six, seven, or eight hours a night. During this time, dust, dead skin cells, sweat, and oil from your body can enter into the fabric, possibly causing yellow stains.

Regularly cleaning your mattress is a good idea whether you suffer from allergies or not. To keep your bed fresh, dust-free, stain-free, and odor-free, we at Kleenrite recommend following this advice every few months.

1. Dust off

The simplest way to remove dust is to use your vacuum cleaner’s upholstery tool. Ideally, this should be done every couple of months or even more often if one of the family members has allergies. Examine the top and sides of the mattress and as much as you can of the bed frame.

Draw dust from beneath the fabric by pressing down firmly on the tool or tapping it on the fabric. Use the crevice tool to smooth out any wrinkles in the quilting, along the edge welting, and the attachment point for a pillow top.

Many newer vacuums now include tools that vibrate against mattress and upholstery fabrics in order to remove dust more effectively.

2. Steam it up a bit.

Steam the mattress with a garment steamer, holding the nozzle as close to the fabric as possible (without causing the steamer to drip).

Steam penetrates deeply into carpets and kills dust mites near the surface. Is there no steamer? Make short bursts of steam with your iron.

3. Eliminate stains

If you sleep by your pets or prefer to snack in bed, your mattress is prone to have stains. The quickest approach to get rid of them is to use a carpet and upholstery cleaner that is designed to get rid of pet stains.

You don’t want to over-wet the mattress. After the stain has been removed, rinse the area with a moist towel to remove any remaining cleanser. Before making the bed, dab the area with a dry cloth and allow the mattress to dry completely.

Summary

Bed stains are inevitable, as long as you sleep or lie on them, though, the extent to which you have stains is different for different users and other circumstances. However, shared above are 3 quick DIY methods you can use in cleaning your Mattress.

Peradventure you had thought the best option to make your mattress look and smell fresh is to dispose and get an entirely new one, we believe this article has helped you to see the possibilities, you don’t need to break the bank to buy a new mattress, except you want to change the size.

This approach can also be used in the cleaning of your home and office furniture, first off, dust off, then steam it up and remove stains.

The mattress is not like your regular bedspread, so please washing every day is not the best for the shelf life of that bed, only clean when it is necessary. These simple approaches can save you time and money. If you have a vacuum cleaner and other required equipment, typical mattress cleaning should be done in less than 30minutes.

At Kleenrite you can contact us for a supply of cleaning equipment and deep cleaning services.

5 Effective Rat Control Measures for Home and Offices

Rats are not pets, they don’t add value to any home or office they occupy, rather, they cause damage to your property, spread disease, several of which can be life-threatening. Rats can also contaminate food storage and kitchens. Rats have also been notorious for chewing electrical wires which can lead to power surges and eventually a fire outbreak.

5 Effective Rat Control Measures for Home and Offices

Things can get messy if proper control measures are not put in place to prevent a total infestation. Good enough, there are many ways to get rid of pests, and in this article, we are looking at the 5 effective ways of combating Rats.

  1. Seal holes in your Home and Office

Rats don’t need a big opening to get inside of your home and office. They are always looking to explore gaps they have been left unattended to, something they make those gaps bigger by digging or chopping.

The best option here is to ensure that the gaps are covered up. Cement, metals place can be used to fill these gaps depending on where the kind of gap and the materials used.

  1. Use natural deterrents

Black pepper, crushed pepper or peppermint oil have been known to be good natural deterrents for most pest infestation, this also works against rat infestation.

Simply spray any of the mentioned near rat holes or areas you have identified as their hotspots

  1. Get rid of Litters

Rats don’t like to be found, especially during the day, they hide behind or under things, away from direct light. One of the easiest ways to rid rats from your home is to make sure they have less or no space to hide, and this can be done by getting rid of litter and food leftovers.

Move objects away from walls and clean up the waste bin after disposal of waste, also ensure that the food is kept in an airtight storage room and containers. Use the fridge to store other perishable food, away from the reach of rats.

Your waste bins should also be closed with a lid when not in use, and to avoid having an overflowing waste bin, dispose of it as soon as possible!

  1. Use traps

The use of bait for catching rats is an age-long method of trapping rats. You just need to set your trap with fish, banana, grains or peanuts as bait. If you want it to be as effective, identify areas where the rats usually congregate and place the traps there.

There are other methods like using poison food crumbs, this method is not entirely safe, if you have toddlers in your homes, if you must use the poison ensure the doors to the place where the rat poison is kept locked.

  1. Call a Professional

If you want a quick solution and don’t want to bother with ‘Do It Yourself’ rat control, call Kleenrite. You’ll especially want to call up a professional if rats are in your home or office, especially if they are in places that are hiding, we will get rid of them without causing more damage to your home or office.

Action Point

So, here you have it! Don’t let rats become a menace in your home or office, their presence doesn’t benefit anyone. We have shared a few DIY rat control measures in the article, we hope that it will come good for you. If you are too busy to try any of these, you should contact us for a fast solution to the rat infestation.